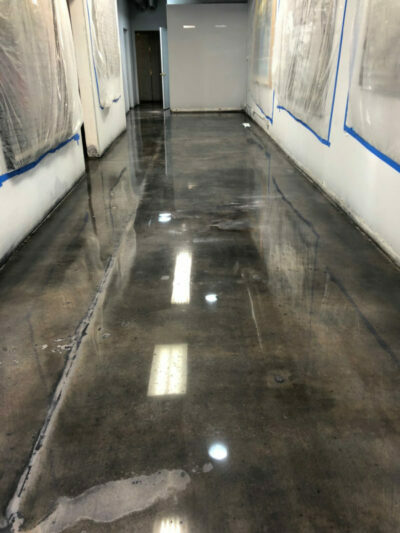
What is Concrete Dye vs Concrete Stain?
While both alter concrete’s appearance, fundamental differences exist between penetrating stains and surface dyes.
Most concrete stains undergo chemical reactions, creating variegated transparent coloring and sinking into the slab.
Dyes cover the top with opaque uniform pigment remaining on the surface.
Concrete Dye Characteristics
- Sitting atop the concrete
- Masking imperfections
- Uniform opaque coloring
- It fades faster unless sealed
- Lower-cost DIY option
Concrete Stain Attributes
- Penetrates into pores
- Transparent variegated coloring
- Enhances imperfections
- Improves with age
- Needs professional installation
| Feature | Concrete Dye | Concrete Stain |
|---|---|---|
| Type of solution | Water-based or solvent-based | Chemical solution |
| Method of application | Applied to the surface and allowed to penetrate | Reacts with the concrete to create a color change |
| Color options | Wide range of colors available | Limited color options available |
| Durability | Less durable than concrete stain | More durable than concrete dye |
| Cost | Less expensive than concrete stain | More expensive than concrete dye |
Which is Better for Decorating Concrete?
Concrete stains outperform dyes thanks to durability, appearance, and endurance but involve higher upfront costs for the processing experience needed. Homeowners on a budget may still appreciate dye as a temporary cosmetic improvement.
Does Dyed or Stained Concrete Last Longer?
Quality stained concrete lasts forever as coloring sinks into the slab. Dyes fade faster by comparison, needing touch-ups or complete reapplication after 1-4 years without consistent sealing—hot climates speed dye failure.
Can Dyed Concrete Get Stained Later?
Staining dyed concrete is possible, but it requires complete dye removal through chemical stripping or abrasive grinding first. Stain then bonds to raw concrete rather than covering other coating barriers.
JK Concrete Polishing: Los Angeles Staining Specialists
Polished Dyed Concrete Floor Process
- Prepare Concrete Surface
- Fill cracks/holes
- Clean thoroughly
- Apply Concrete Dye
- Optimal conditions: 60-90F & low humidity
- Add uniform color using high-quality dye
- Let Concrete Dye Cure
- 24-48 hours is crucial for proper adhesion
- Polish Dyed Concrete
- Begin with 50-100 grit metal bond diamonds
- Refine up to 3000+ grit resin polishing pads
- Protect Finish
- After final buffing up to the desired sheen, apply concrete sealant
- Penetrating or topical options
- Reapply every 1-3 years
The dye application creates a consistent canvas background color before polishing equipment refines the concrete profile for a stunning, high visual depth.
Curing concrete adequately prevents issues with dye delaminating during the grinding process.
Thoughtful process steps deliver brilliant, long-lasting, polished, and dyed artisan concrete floors.
- Dyed Concrete Pros
- Affordable DIY-friendly option
- Uniform, consistent coloring
- Quicker/simpler application
- Can disguise concrete flaws
Dyed Concrete Cons
- Fades faster than stains
- No realistic textured effects
- Needs consistent resealing
- Harsher chemical strippers, if removed later
- Limited custom design capabilities
Stained Concrete Pros
- Deep penetration for unmatched permanence
- Mimics natural designs as color varies
- Enhances concrete imperfections over time
- Extreme durability decades lasting
- Low maintenance without reapplication
Stained Concrete Cons
- Higher upfront installation costs
- Needs experienced applicators
- Longer curing process
- Rework is complex once applied
- Base colors dominate accents
Dyed vs. Stained Concrete FAQs
Does stained or dyed concrete get slippery?
No. Properly applied dyes or stains avoid changing concrete slip resistance or traction levels.
Optional grip additives like SharkGrip can further enhance safety.
What’s the cost difference between staining and dyeing?
Concrete stain costs $4-$6 per square foot professionally installed.
Concrete dye is a DIY-friendly option for $2-$3 per square foot.
Can you acid-stain over-dyed concrete?
No, dyes must first be removed through grinding or chemical stripping since acid stains require penetrating untreated concrete.
Light dye applications may become transparent enough for staining.
How long do concrete dyes last?
On average, 2-4 years before fading if the surface experiences extensive traffic, sun exposure, or weathering.
Staining lasts exponentially longer thanks to molecular bonding below concrete pores.
What colored concrete option looks most natural?
The concrete staining technique easily mimics the natural look of stone.
The transparent variegated coloring sinks into imperfections for authentic, mottled stone-like finishes.
In summary, staining surpasses dyes for dramatically enhancing concrete floors and spaces with artistic, durable transformations but carries a higher price point.
Contact JK Concrete Polishing for quotes crafting custom Los Angeles stained concrete projects of any scale that will impress for decades.20
